Welcome

Thank you for visiting my blog. I hope you find interesting ideas and inspiring images. Any feedback or suggestions would be appreciated! Check out my facebook page.

About Me

My photo
My name is Gerrie Wydeven doing-business-as Wydeven Designs. I have been conducting this small GREEN business since 2004. Wydeven Designs, based in the Atlanta, Georgia area, sells CHAIRS, LOVESEATS, CHAISES, SETTEES and other fine, well-constructed refurbished upholstered pieces. I love to travel, cook, take photographs and generally follow style and decor topics as well!

Friday, December 28, 2012

Color Trends for 2013 - Emerald Green


The self-proclaimed "color/colour" expert for fashion and design is Pantone link to website.  They have proclaimed the color "emerald" to be THE COLOR of 2013 and, not surprisingly, the design magazines and websites are starting to burst with this color.
Pantone® 17-5641 Emerald is a deeper color, at once evocative of the luxury of precious gems and the lush, verdant greens of nature.
It is a very strong green and it will be interesting to see how well it does for the more general consumers.  Last year's color, tangerine orange, was certainly seen in design spreads but not too many people actually used much of it in their homes.

Here are some emerald green images that I have collected on my pinterest board link to board and sources.  I do love the brightness of this color!


While I have a few green chairs "in production", I only have one in my current inventory that comes close to this strong saturated color. I am showing it in a mini-collage with one of my Hipstamatic IPhone photos of holiday decorations in the house.  In these waning days of the 2012 Christmas holidays, the emerald color can be a way to honor the season all year round!
This lovely chair may be sold but has been available on eBay and Etsy!


Monday, December 24, 2012

Happy Holidays!

I am celebrating with my family in Atlanta and will be traveling to Chicago to do New Years with my sister - Happy Holidays!


Saturday, December 22, 2012

Learn with me - IPhone Photography - Hipstamatic App

Here is the third in my series practicing new skills using my IPhone photography features with new apps.  See more introduction and other posting here.  In this posting, I am using the Hipstamatic App - link to website about app.  There is also a blog and a pinterest board that provides tips, techniques and awe-inspiring images - link to pinterest board.
Hipstamatic is a digital photography application for the Apple iPhone sold by Synthetic Corporation. It uses the iPhone's camera to allow the user to shoot square photographs, to which it applies a number of software filters to make the images look as though they were taken with an antique film camera. The user can choose among a number of effects which are presented in the application as simulated lensesfilms and flashes. Several of these are included with the application, while others may be acquired through an in-app purchase. Popular, the application has sold 1.4 million copies, as of November 2010.  source
As mentioned in this description, the application allows you to switch lenses, films, and flashes.  I do not like to use flashes in my photography so I haven't practiced with those at all - someday, perhaps.  I am practicing with the various combination of lenses and films which are easily switchable on the camera.  The best way to evaluate the results is just to shoot away and see what you get.  It is a fun and easy to use application.

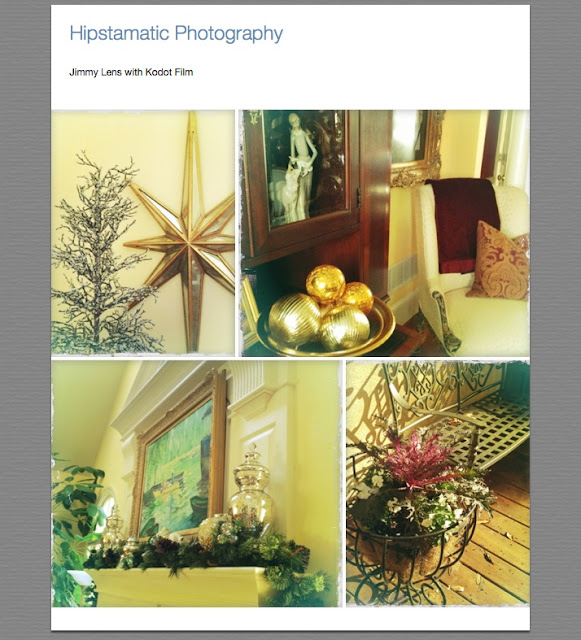
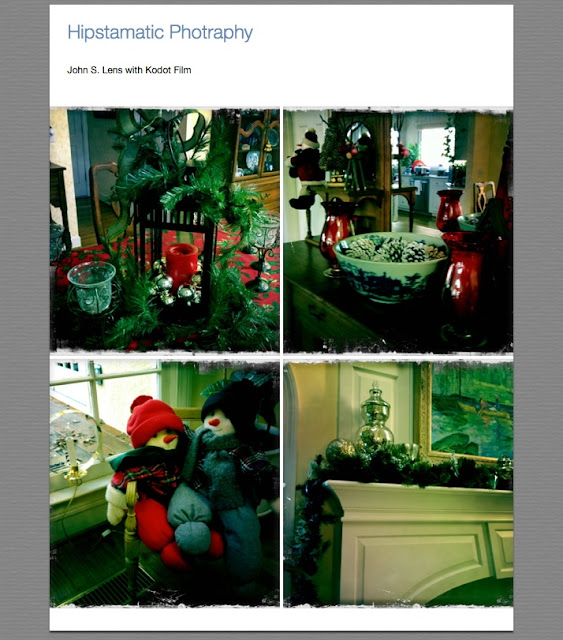
Here are the results of using one film (Kodot) and all the free lenses that come with the basic app.  I am looking to add a black and white film but otherwise will probably stick with these.

The film Kodot is defined as follows:
Being a little rough around the edges never hurt anybody. Kodot's XGrizzled addes a vintage ‘just out of the dryer' look to your prints. source
I used this film with the following lenses - all are explained here - source:

  • John S.
  • Jane
  • Jimmy
  • Karmal Mark II
  • Buckhorst H1 
Here are the results:


I am not seeing a huge difference between the John S. and Jane lenses - the other lenses definitely give you a different look.  I will be experimenting more but this may be it before my holiday company comes today!  

HAPPY HOLIDAYS and happy photographing!  

Wednesday, December 19, 2012

Before and After - Repaint, Reupholster and Restore

I just got my January, 2013, issue of Southern Living link to magazine website and found an article that could have included ME - "Repaint, Reupholster, Restore: Three Southern Makeover Experts Show That With a Little Paint, Fabric, and Inspiration, There's No Such Thing as a Lost Cause".

I have been refurbishing well-constructed upholstered furniture since 2004 as a business and since I started buying furniture in college for myself - quite a while ago. I could write this article - I could write the book! Here are some excepts that speak to me!
What makes a piece makeover worthy? I look for classic shapes, interesting lines, and special details. Matching sets of chairs are always a good find. Don't buy anything with structural damage to the frame.  Be persistent and shop often.  Leave the upholstery to a professionals.  (emphasis added by me).  Jamie Meares, Furbish Studio, Raleigh, NC link to her website
Why restore old furniture? It gives you a home that is totally unique. I want people to enjoy and use the furniture that has been handed down for centuries. [secret is] great fabrics!  Tara Shaw, Tara Shaw Antiques, New Orleans, LA - unable to open website.
Why do you love vintage furniture? Making over old furniture adds character to a room. Look for pieces that are unique with clean lines. Mix furniture from different eras. I like to use a combination of antiques, mid-century finds, and new pieces. Cynthia Collins, Blue Print and Collins Interiors, Dallas, TX link to website
To illustrate all of these fine points, here are some of my most recent "before and after" examples of restored upholstered furniture.


So inspirational - I think I'll spend this lovely day going around to the thrift and charity shops just to check them out one more time!

This posting is linked here - Wow us Wednesday

Sunday, December 16, 2012

Learn With Me - IPhone Photography - ProHDR App

Last week, I attended a class at Chastain Park in the City of Atlanta to improve my skills using the IPhone photography function. My first posting on this subject link to my posting describes this class in more detail and includes the listing of photo apps that the instructor recommended. I am trying to familiarize myself with each one of them.

Today is a rainy, gloomy day in the area and I thought it would be a good opportunity to try out the ProHDR app. For a description of High Dynamic Range Imagery (HDR) and the difficulties cameras have in capturing light - check this source. The human eye has a sensitivity to light from dark to bright, so does a camera. The human eye however is about 10 times more sensitive to that “Dynamic Range” than most cameras can capture.  

The ProHDR app helps the camera adjust to the variations of light by taking two images and merging them. The 2.5 version I have dates from 2010 and is free. The newer 4.2 version is $1.99 - I may ramp up to this once I have learned how to use the freebie!
Thanks to Pro HDR, you no longer have to choose between a blown-out sky or a hopelessly dark foreground. Bringing high dynamic range photography to your iPhone, Pro HDR lets you capture an image exposed for the highlights and another exposed for the shadows. It then automatically aligns and blends the images, giving you a gorgeous HDR image up to 5 megapixels like nothing you've ever seen from such a .tiny device.  link to website.
I planned to take some outside photography but decided to just test it on inside shots and standing by the doorway looking out.  Since I HATE to use flashes in any of my photos, regardless of subject or location, I am thrilled with how nicely it handles low and varying light situations.  I love the results - here are some similar shots - taken with the basic IPhone camera and taken with ProHDR - see the difference!
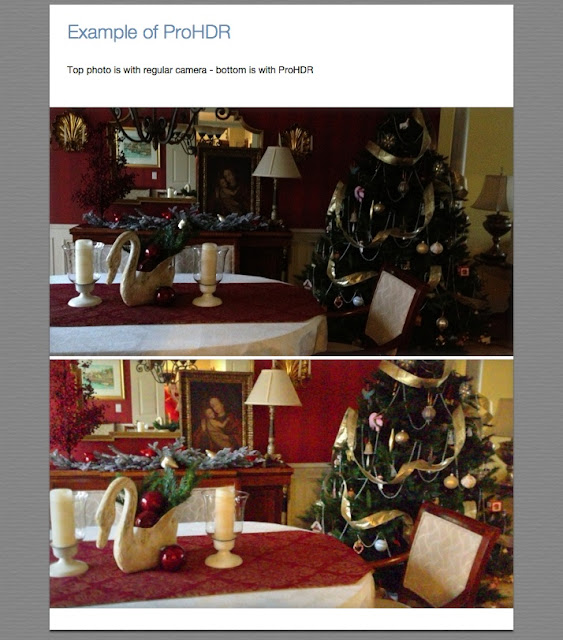


Here are three examples of photos taken with my regular IPhone camera and those taken with ProHDR.  Since I hate to use a flash in any circumstance, I particularly like the difference in inside shots.
The app is VERY EASY to use (not true of all apps)! After opening, you have three choices - our instructor suggested using the "Auto HDR" mode and I am not familiar with the other two choices (Manual HDR or Library HDR).  Once opened on Auto HDR, you can take a photo as soon as you identify your subject; tap the screen, hold very still; and, watch the two images emerge and quickly combine.  At this point you can make up to five easy adjustments (I have used the "warmth" scale but seldom need the others) and then save the picture to your camera roll where you may want to executive another app to do cropping or other editing.

Here are some photos taken today and some preliminary lessons learned.  I have not cropped or done any other editing with these photos.  I also don't know how to remove the tag at the bottom??


Lessons Learned
  1.  It is REALLY important to hold that IPhone still to get the two shots of the exact same thing.  You can see some "fuzziness" in some of my photos - the result of my own shakiness.  The instructor suggested using something to steady the camera such as placing it on a solid surface or tripod-like item.
  2. The ProHDR camera does not have a zoom lens (at least not this version), so proximity to subject being photographed is important.
  3. Shots with animals or children (maybe even most adults) will be hard to do well because of the two photo process - even very slight movements will create blurs (which is too bad for Christmas Eve low-light gift opening).
  4. Best application for me thus far is inside still photography shots (no moving parts other than me) with inadequate lighting - it is magical how well this works!
I plan to continue to practice and may spend the $1.99 for the newer version which is supposedly faster and has a few other editing options.


This posting is linked to the following - A - Z link party.

Friday, December 14, 2012

Learn With Me - Iphone Photography - Introduction to Basic Camera

Panoramic View of Kitchen and Family Room using IPhone Camera - didn't know my basic camera could do this - now  I need to improve quality!
I have been a photography enthusiast all my life and always travel with a camera. In order to broaden my knowledge of the camera in my IPhone (4S version), I took a three day (nine hours) course at Chastain Art Center located in lovely Chastain Park in the city of Atlanta - link to website. The course "IPhone Photography workshop" is taught by Marie Matthews, an artist and avid Iphone photography fan - link to website. I not only learned much more about the camera already in my IPhone, but learned about and added a few apps for the class and now need to practice to get proficient at using all this new knowledge. I plan to use this blog as an opportunity to practice and help others learn with me!

Before we started, Marie asked us to add the following apps to our phone (or IPads).  As I explore these apps and practice, I will be discussing more of them.  This posting provides some basic photography tips that I found useful (or provided brand-new information to me) and a link to a good introductory tutorial.

  • Camera+
  • PhotoSync
  • PhotoWizard
  • Snapseed
  • Hipstamatic 
  • ProHDR 
  • Jazz
  • Pixlr Express 
  • Touch Retouch 
  • Superimpose 
  • PhotoSize
PHOTOGRAPHY TIPS   
  1. Keep the lens clean - use special cloths or soft fabric to clean the lens each day.
  2. Get close to your subject - best photos are 4-19" from subject.
  3. Hold phone with two hands close to chest to keep the camera still and avoid fuzzy images.
  4. Use focus feature on camera by tapping smaller area of image to "set" the area of emphasis and waiting for it to become clear before shooting (I was amazed by this feature).
  5. Set the "grid" option on to help create more balanced compositions and straighter photos.
  6. Use Panorama feature by engaging (options) and tapping camera to start and again to stop - moving slowly with the camera and holding at same level (again holding with two hands in front of chest helps with this).
  7. Use flash by moving to left for software flash and right for built-in flash - practice this to see if you want to use at all - most pictures look best in natural lighting (I agree with this).
  8. IPhoto images are about 1600 X 2000 pixels - ideal for enlarging to 10X10 but may be able to get as large as 20X20.
  9. Earplugs for IPhone have a remote clicker/camera button on the volume setting (I need to practice this one).
  10. You can access camera button without unlocking your screen - look for camera button on lower right hand side.
This was a good refresher for me and I plan to check out some tutorials to add to my knowledge.  link to a good introductory tutorial.  There are a TON out there!  Good luck!

Wednesday, December 12, 2012

Touring and Shopping the Low Country - Beaufort, SC


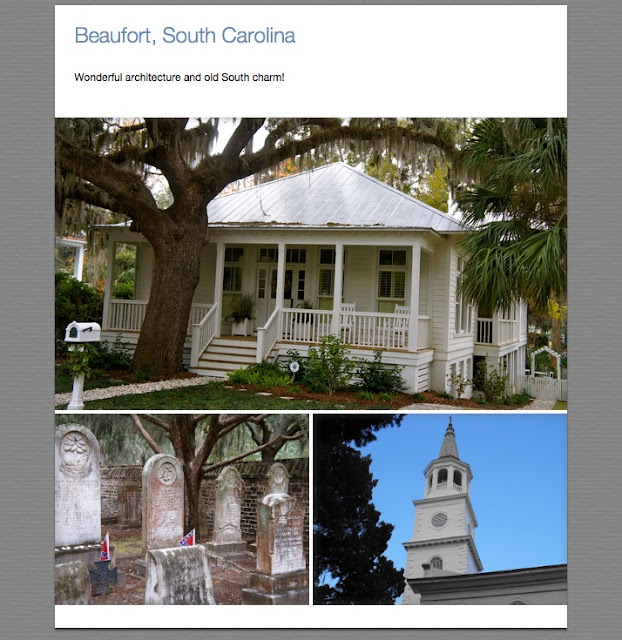
This is the last in my series about touring and shopping in the Low Country - that area of the Southeastern United States along the Atlantic Ocean coast distinguished by flat areas of sandy soil, barrier islands, and distinctive southern charm. My husband and I spend a week in late November on Hilton Head Island and scouted the nearby areas.  A partial day trip to Beaufort was on our agenda.

Beaufort is a city in and the county seat of Beaufort County, South Carolina, USA.[4] Chartered in 1711, it is the second-oldest city in South Carolina, behind Charleston. The city's population was 12,361 in the 2010 census. It is located in the Hilton Head Island-Beaufort Micropolitan Area.
Beaufort is located on Port Royal Island, in the heart of the Sea Islands and Lowcountry. The city is renowned for its scenic location and for maintaining a historic character by preservation of its antebellum architecture. The city is also known for its military establishments, being located in close proximity to Parris Island and a U.S. Naval Hospital, in addition to being home of the Marine Corps Air Station BeaufortLink to Site.
We have been to Beaufort before and took advantage of some of the many tours available to see the historic district and hear about Beaufort's unique history - including the fact that it was one of only a few southern cities not destroyed during the Civil War (or War of Northern Aggression as it is still called here in the South).  This was a shorter stay and included a quick drive around (and stop at an historic church), lunch, and shopping in downtown Beaufort.  We found a great local seafood place for lunch on Lady's Island called "Steamers" which we highly recommend!

Beaufort is a very charming city and well worth taking the time to get to know it better.  It is about an hour's drive from Hilton Head Island.  Here are several websites with information about tours, places to stay and nearby attractions - Tourist Information and City Information.

Here are some photo highlights of the trip - I will be returning for a longer stay in June of 2013 when we are having a family reunion on Hilton Head Island.


Monday, December 10, 2012

Pinterest Dreaming in Green

I love pinterest and have been actively saving/pinning now for almost a year. One use I make of my boards is to keep track of color trends and combinations. I have set up boards to reflect varying color options. Here's the link to my "green" board.  I also like to juxtapose my own Wydeven Design refurbished furniture (link to my website - also sold on Etsy and eBay) with these settings and this posting is a pictoral of some of my green pieces into settings saved on pinterest - all sources are on my green board.  BTW, I just read that "emerald green" is Pantone's color of the year for 2013.  I don't know if any of my pieces are exactly emerald but it is nice to see the color green honored!

Love this chair and love combination of blue and green!
Same chair with green console - very refreshing!
I have used this fabric for about six pieces - last of the roll from Calico Corners.
Sweet chairs in apple green linen - like the fresh combination options.
These linen-covered vintage chairs were refurbished with Annie Sloan Chalk Paint (ASCP).
Ahhh - Pinterest Dreaming!


Saturday, December 8, 2012

December Visit to Scott's Antique Markets - Atlanta

Outside sign at Scott's Antique Markets
This is the second weekend of the month and an opportunity to visit one of my favorite Atlanta marketplaces - Scott's Antique Market link to website. Today, I was checking out my newly arrived January issue of Architectural Digest and saw an article called "Insider Secrets of the AD100".  These designers discuss travel, inspiration and sources secrets.  One of the designers interviewed, Atlantan Suzanne Kasler, provided the following source secret:
Every time I go to Scott's Antique Markets in Atlanta ... I find unique items: maybe a fabulous wood sphere, great art fabric, or custom-made pillows.  Really anything you can think of."
How timely! My normal companion on these trips (friend Bette) and I, however, were somewhat disappointed in this month's market. The booths were less crowded with wares for sale and less populated with buyers. We discussed this with several vendors who said that this is a low-volume sale month for many vendors and some have just stopped coming. Here we were hoping for a huge holiday extravaganza and opportunities for last minute gift shopping. Nevertheless, it was a beautiful warm day and we enjoyed our visit including the highly-recommended ice cream cones in the Southern building.

Here are some of the red and green items we saw - all would work well in a holiday setting.


One of our favorite South Building vendors - beautiful floral arrangements - a little pricey but one of these days we plan to buy!
I bought five of these hand-made reindeer and added bows. Three of them are proudly displayed in my foyer.  My plan is (was) to give them as holiday dinner favors to my family but I may just keep them!